The programming process

After the physical construction of the REX, the final step is to program it. Programming the REX is done in two stages: The CPLD and the flash.

CPLD

Programming the CPLD is done with a special programmer from Xilinx. The programmer uses the JTAG interface to program the CPLD. JTAG specifies a common standard for on-chip hardware that is used for programming and debugging IC-level stuff. More info can be found on Wikipedia, of course. The connection to the CPLD is six pins that are usually connected via a male pin header. The REX connection, though, is simply unpopulated vias, so a pin set is needed to connect the female header on the Xilinx cable. I used square wire-wrap pins cut from a connector that I had lying around.

Flash

The flash memory on the REX must be programmed by a program running on the Tandy itself, since the REX doesn’t make any connections available for directly programming the flash. I could use a TSOP-48 adapter to program the flash in an external chip programmer (I have access to an older Xeltek) but I’m not sure I would trust the code in the chip after the soldering process.

The flash programming is done my a machine-language executable (.CO) on the Tandy. Of course, getting the .CO file onto a cold-booted Tandy 100 requires us to first have a DOS loaded. Since the REX flasher application needs DOS anyway in order to load the ROM files that we’ll be flashing, this isn’t wasted effort. But it was something I’d never actually managed to do before.

I’m starting to see a pattern with this project: almost as soon as I realize I need something, someone on the M100 list posts and offers exactly what I need. In this case, it was Kurt McCullum who added an awesome feature into the Android version of mComm: the ability to send DOS.

mComm is one of several programs available that emulate some version of the Tandy Portable Disk Drive. This was a device sold by Tandy that connected to the serial port on the M100 and gave you access to 100K of disk storage on a 3.5-inch diskette. It, too, had it’s own bootstrapping procedure where it copied a small disk driver onto the M100. Later, Traveling Software would vastly improve on Tandy’s driver and release their product called “TS-DOS” in both ROM and RAM versions. It is this RAM version that I need to load onto my M102 so that I can get the REX flash utility.

By using a USB on-the-go cable, I can connect a USB-to-serial cable to my Android phone. This connects to my M102 using a null-modem adapter and a 9-to-25 pin adapter. Then, in BASIC on the M102, you type

RUN "COM:98N1E"

and tap “send” on the phone. The BASIC interpreter will execute the bootstrap loader, which basically POKEs TS-DOS into RAM in the right place. It provides handy instructions on the screen and little progress dots as it’s loading DOS. Then, after CLEARing space in high memory (CLEAR 0,55000) you can run TS-DOS from the menu, and you’ve got DOS! Amazing!

I had issues at first that I imagine came down to flow control. The serial UART on the M100/102 have a tiny, tiny little buffer, so it’s easy to drop bits if the CPU can’t keep up. Flow control is used to allow the M100 to tell the sending device to stop for a moment to allow the CPU to catch up. Some (many, actually) cheap USB-serial devices don’t implement flow control properly, and some (again, many) null-modem adapters don’t cross the flow control lines properly. I finally found a combo that worked: an FTDI-based cable and my roughly 30-year-old Radio Shack brand 25-pin null modem adapter. How fitting.

With TS-DOS installed in RAM, I can then load the REX flash program, ‘RF149.CO’. This program, when executed, will make the magic address calls to the REX which will:

  • Erase the flash chip
  • Program the REXMGR software into blocks 0 and 1
  • Program TS-DOS into block 8
  • Create an initial RAM backup image on the flash

RF149.CO pulls these files from the TPDD device (or emulator in my case) which is the other reason we need DOS in RAM in order to flash the REX, since the Tandy doesn’t have anywhere near the RAM capacity to hold all the data that needs to be programmed into the flash chip.

After this, you can cold-start the M100, run CALL 63012 from BASIC and the REXMGR will be loaded. After this, it functions transparently as an option ROM to the Tandy OS.

The REX is a really great little gadget and I see what all the fuss is about. For more information on it’s design check out the Bitchin 100 wiki at

http://bitchin100.com/wiki/index.php?title=REX_Overview
 

Castellated PCBs are here!

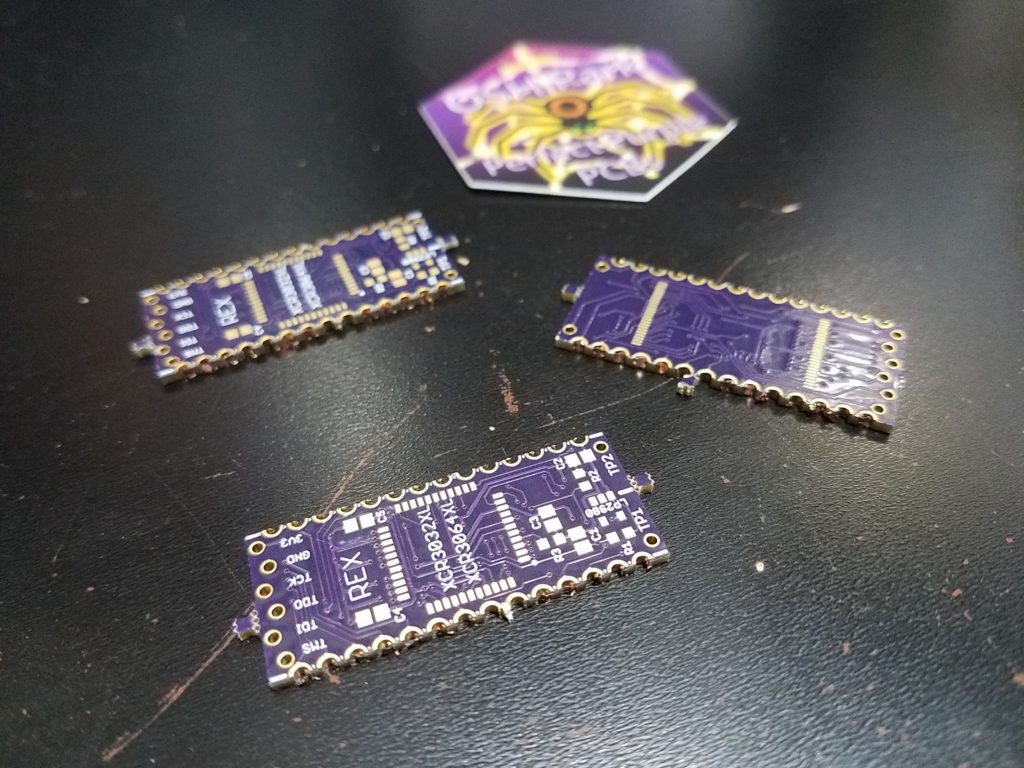
The pre-castellated PC boards arrived from OSH Park yesterday. The router paths that Stephen added look to be spot-on, and the router actually seems to have cut them darn near perfectly. The path went right outside the silk-screened grinding guides (that show how far the non-castellated boards should be sanded/ground) and left just a tiny bit of excess to be sanded. OSH Park’s milling tolerance is 5mil so there’s a but of variance across the three boards that I received, but all of them look usable. And they’ve got a special Halloween sticker, too.

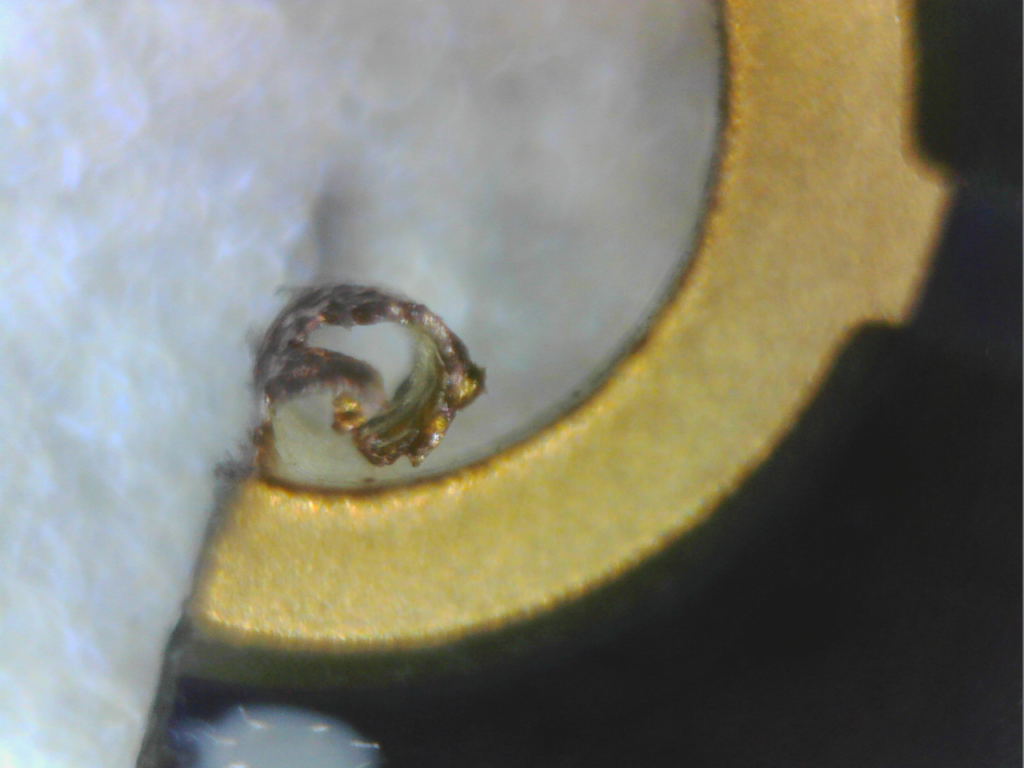
I broke out my USB microscope to get a few pictures of the edges as they came from the factory. The first one shows a tab of fiberglass that didn’t get trimmed or cut, as well as a small copper tab inside the via. These get folded over into the castellation in just about every hole.

And some are larger than others.

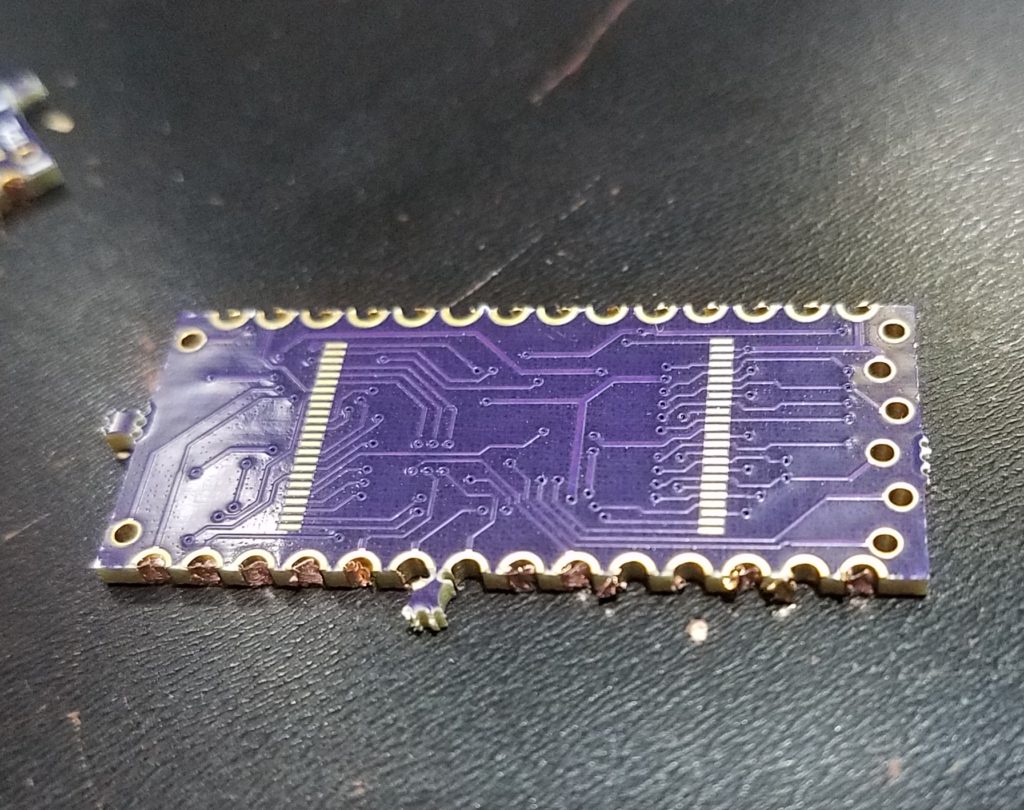
After cleaning up one of them with a pocket knife, the result is pretty good, even with no grinding or sanding yet.

Overall I’m really pleased with how these boards came out from the factory. Here’s the underside. You can see a bit of tab as well as lots more copper to clean up. Hopefully I’ll get a chance to assemble and test these boards in the next couple days.

The option ROM socket

In they early 1980s, computers were hard. They were, on the whole, large, expensive, clunky, and difficult to operate. Graphical user interfaces were not yet a thing, and manufacturers really didn’t have a good handle on how to make computers easy to use and understand yet.

Tandy’s general approach to marketing computers had been to leverage their massive network of Radio Shack stores as both sales channel and service/support facilities. The pitch was simple: If you ever have any problems with your Tandy/Radio Shack computer, bring it to your local store (they had thousands, so a large portion of the U.S. population was easy driving distance to one), and a friendly technician would help you with it. Sure, this kind of support load would be a losing proposition today, but back when making computer hardware was actually profitable, companies viewed support as essential to making the hardware sale.

One of the ways that its designers tried to simplify the Model 100 family, was by shipping all software in the form of ROM modules. This had a couple of clear advantages over other systems of the time:

  • Software loaded instantly
  • No disks to lose or fail
  • Copy protection

But it had one fairly big drawback: The user had to actually install hardware to install software. Clearly, this would have been intimidating to a lot of potential users, so Tandy attacked this problem in two ways. First, software that you bought from Radio Shack would be installed by the sales tech at no charge. And, second, the machine used a special snap-in module socket instead of a chip with pins. This allowed the module to be installed without risk of bending or breaking the fragile pins on a traditional ROM IC.

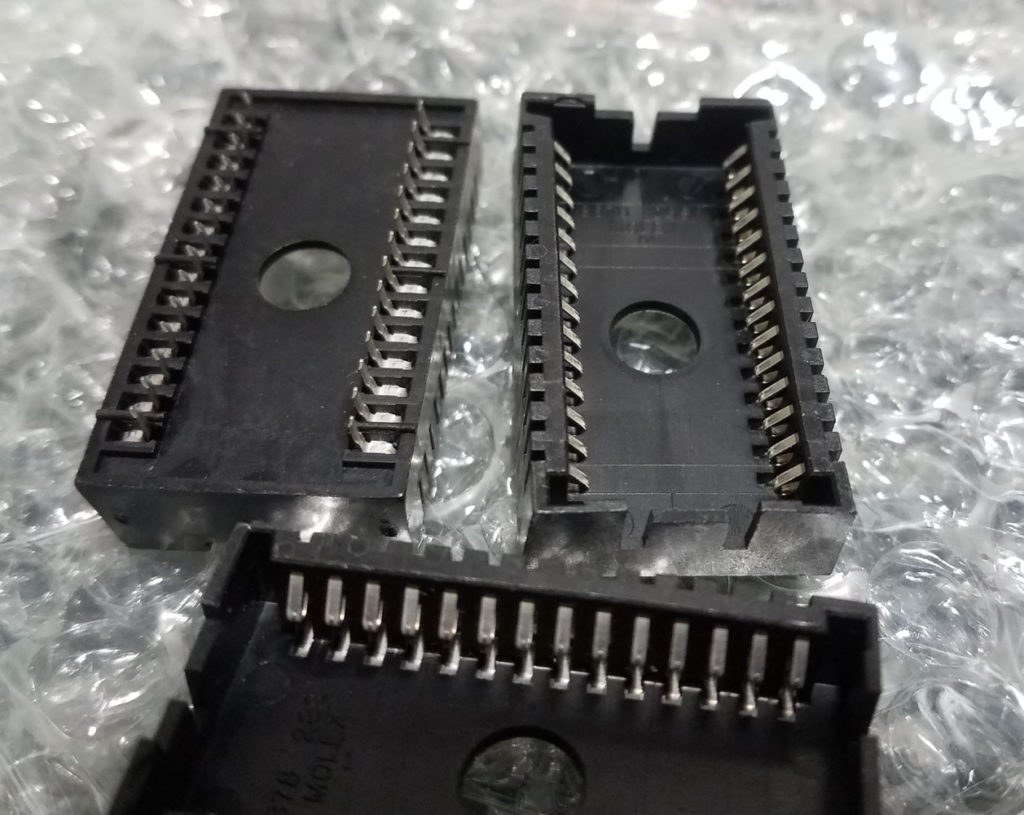
This module socket is the Molex 50-39-5288. Like everything in this project, it’s obsolete and not manufactured anymore.

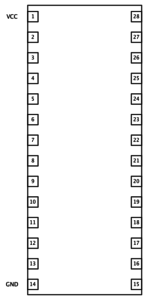
Of course, these special modules didn’t share the normal JEDEC pinout of the common DIP-28 IC ROMs, oh, no. There were a couple of key differences, just to shake things up, I guess. But the only thing I care about at this stage is power and ground, and they’re still located in the usual places. So, if I can get my hands on one of these Molex sockets, I can easily supply 5 volts to the REX while flashing the CPLD. I powered the first 2 boards in the Tandy itself while flashing, and that’s a bit clunky and slightly nerve-wracking. This will be better.

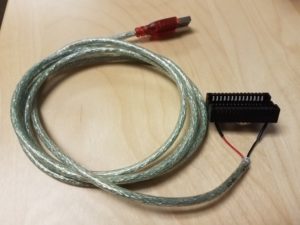
Again, a kind member on the M100 list had a good stash of these sockets and sold me a few really cheap (thanks Brian!) so all I need to do is wire power and ground to it as indicated above and Bob’s my uncle! Luckily, USB is a cheap and easy 5 volt source and I have a ton of cables lying around ready to be hacked.


The community

By far, the biggest and most important part of being a vintage computer enthusiast is the joy of being part of a community of other vintage/retro computer enthusiasts. Despite being what feels like a relatively obscure hobby, there are many hundreds of other old computer geeks that cluster around web sites, forums, social media, podcasts, and computer shows.

One of (if not the) biggest communities of Tandy 100 enthusiasts is the M100 mailing list, hosted at bitchin100.com. In order to gauge possible interest in a new run of REXes, I set up a Google form with a basic “sign-up” sheet. Less than a week after posting this form to the mailing list with a quick explanation of my goal, I had interests in over 60 REX units!

I allowed respondents to enter the number of units they were interested in. The majority just wanted a single unit, but clearly there are some who need a REX for a larger fleet, or maybe just wanted a spare. I should have probably restricted the number of requests in an effort to make sure that people only request enough for their own personal use and not for re-selling. When I open up an actual (pre)order I’ll have to remember to do that.

So, clearly there’s still a big interest. This is part of what’s driving me to want to actually do a production run. I’m going to take it as an omen that I saw this quote on Twitter recently:

Building my First REX

As I mentioned in my first post, I’ve successfully built a REX based on the plans, parts, and directions available from Stephen and Brian. In the end, the process was not difficult, but it’s not “easy” either, so I thought I would write up some details about the actual construction process.

Instructions

The main instructions I followed are here:

http://tandy.wiki/Building_a_REX

These were compiled by Brian after his experience building his REX units, and include all the major steps needed to build one. The major steps break down as

  1. Shape the printed circuit (PC) board
  2. Solder the components
  3. Flash the CPLD firmware
  4. Program the flash memory

Getting the Parts

Another great thing Brian has done is locate suppliers for all the parts needed to build a REX. The bill-of-materials (complete list of parts needed) for the REX is actually quite small: 2 resistors, 1 capacitor, a voltage regulator, the CPLD, and the flash chip. However, the CPLD and flash chip can be somewhat difficult to find; both are “obsolete” parts, meaning that they aren’t made anymore. Brian created a single link to the supplier DigiKey which loads your cart with almost all the parts needed. Almost…

The flash chip used by the REX is an “old school” 8 megabit parallel NOR flash. Digikey doesn’t sell any compatible part, but there are still plenty out in the world that are available from other distributors. (We don’t have to take extreme measures to come up with these.. yet.)

The PC board is, perhaps, the easiest of the parts to obtain, since Stephen kindly made the board available from OSH Park, a hobbyist-friendly PCB house. The only minor issue is that they are only available in batches of three. The boards are very inexpensive, so if you’re not building three, it’s no big loss to have a spare board. In fact, having a spare might be really useful, considering the next step…

Shaping the board

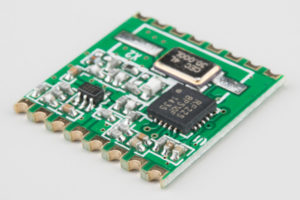
image courtesy of Sparkfun.com

The Tandy 100 uses a special option ROM socket that accepts modules with castellated mounting edges, like the photo shown here (borrowed from Sparkfun). Unlike normal DIP ROM chips where pins are inserted into sockets, the Tandy option ROM socket has protruding tabs that connect with the half-moon holes in the castellated board. It’s easy to make a castellated board by just creating plated vias near the edge and then just cut or sand the board down until half of the vias are exposed. Easy… but tedious. I used 80-grit sandpaper to get most of the material off and then finished with something like 160 until I had a nice smooth edge. Then, you need to go over it with a sharp knife and cut off any remaining copper bits that have either folded into the vias or are hanging off the top or bottom.

Soldering to components

The REX is built with entirely surface-mounted (SMT) parts. To someone with little experience with soldering (and even for some with lots of through-hole experience) this can seem daunting. But, like all things that look like “wizard-level” skills, successful SMT soldering is really just a  combination of a special technique and the right tools. The technique I use is call “drag soldering” and the special tools are not expensive — just special. Of course, a certain amount of manual dexterity and experience using a soldering iron is required. I plan on making a dedicated post for my soldering technique and experience.

CPLD programming

The CPLD (complex programmable logic device) is a device with logic gates that be programmatically turned into any digital logic circuit that the designer wants. The ship from the factory in a useless state and have to be programmed to do anything useful. The process of “programming” the CPLD is the loading of the designer’s circuit into the device, giving it the intended functionality.

In the case of the REX, Stephen’s CPLD program (released as a .jed file) needs to be loaded onto the REX CPLD. This requires a special (although, again, not expensive) programmer from Xilinx and their programming software. As the REX uses an older CPLD, it only requires older, commonly-available, and inexpensive “Platform USB” programmers, available on eBay for around $25. In my case, though, another fellow on the Model 100 list actually sent me his programmer (along with a complete set of parts) in exchange for assembling some REX units for him. So I’ll be using this to program the REX units.

The REX board includes a set of vias to which the programming cable needs to be attached. They are arranged in an offset configuration which I’ve never seen before, but which is intended to help keep the cable pins in contact with the vias. I connect to these vias, I cut some wire-wrap pins to the correct length to insert into the programming cable and then make contact with the vias.

Flash programming

After the CPLD has been programmed, the REX is a functioning device. But, it order to do anything with it in the Model 100, you need to program some data into the flash memory chip. The design of the REX precludes programming the flash chip with an external programmer, so this is done directly by the Tandy 100 – “in-situ” as it were. The basic process is:

  1. Bootstrap TS-DOS in RAM
  2. Use TS-DOS to load the REX flash .CO program
  3. Run the REX flash .CO, which will load more files from a TPDD device and program them into the flash memory

That’s the basic process. I’ll document the individual stages later.

Happy RetroChallenging!